【Python】 KerasでU-Net構造ネットワークによるセグメンテーションをする
ここ(Daimler Pedestrian Segmentation Benchmark)から取得できるデータセットを使って、写真から人を抽出するセグメンテーション問題を解いてみます。U-Netはここ( U-Net: Convolutional Networks for Biomedical Image Segmentation )で初めて発表された構造と思いますが、セグメンテーション問題にMax Poolingを使うのは良くないといった話があったり、Batch Normalization等も使いたいということで、pix2pixのGeneratorとして利用されているU-Net構造のネットワークを利用します。
実行環境は以下になります。
- Windows10 64bit
- Python3.5.2
- Keras2.0.4
- BackendはTensorflow CPU版
まずはU-Netモデルを作るクラスです(unet.py)。
#!/usr/bin/env python
# -*- coding: utf-8 -*-
from keras.models import Model
from keras.layers import Input
from keras.layers.convolutional import Conv2D, ZeroPadding2D, Conv2DTranspose
from keras.layers.merge import concatenate
from keras.layers import LeakyReLU, BatchNormalization, Activation, Dropout

class UNet(object):
    def __init__(self, input_channel_count, output_channel_count, first_layer_filter_count):
        self.INPUT_IMAGE_SIZE = 256
        self.CONCATENATE_AXIS = -1
        self.CONV_FILTER_SIZE = 4
        self.CONV_STRIDE = 2
        self.CONV_PADDING = (1, 1)
        self.DECONV_FILTER_SIZE = 2
        self.DECONV_STRIDE = 2

        # (256 x 256 x input_channel_count)
        inputs = Input((self.INPUT_IMAGE_SIZE, self.INPUT_IMAGE_SIZE, input_channel_count))

        # エンコーダーの作成
        # (128 x 128 x N)
        enc1 = ZeroPadding2D(self.CONV_PADDING)(inputs)
        enc1 = Conv2D(first_layer_filter_count, self.CONV_FILTER_SIZE, strides=self.CONV_STRIDE)(enc1)

        # (64 x 64 x 2N)
        filter_count = first_layer_filter_count*2
        enc2 = self._add_encoding_layer(filter_count, enc1)

        # (32 x 32 x 4N)
        filter_count = first_layer_filter_count*4
        enc3 = self._add_encoding_layer(filter_count, enc2)

        # (16 x 16 x 8N)
        filter_count = first_layer_filter_count*8
        enc4 = self._add_encoding_layer(filter_count, enc3)

        # (8 x 8 x 8N)
        enc5 = self._add_encoding_layer(filter_count, enc4)

        # (4 x 4 x 8N)
        enc6 = self._add_encoding_layer(filter_count, enc5)

        # (2 x 2 x 8N)
        enc7 = self._add_encoding_layer(filter_count, enc6)

        # (1 x 1 x 8N)
        enc8 = self._add_encoding_layer(filter_count, enc7)

        # デコーダーの作成
        # (2 x 2 x 8N)
        dec1 = self._add_decoding_layer(filter_count, True, enc8)
        dec1 = concatenate([dec1, enc7], axis=self.CONCATENATE_AXIS)

        # (4 x 4 x 8N)
        dec2 = self._add_decoding_layer(filter_count, True, dec1)
        dec2 = concatenate([dec2, enc6], axis=self.CONCATENATE_AXIS)

        # (8 x 8 x 8N)
        dec3 = self._add_decoding_layer(filter_count, True, dec2)
        dec3 = concatenate([dec3, enc5], axis=self.CONCATENATE_AXIS)

        # (16 x 16 x 8N)
        dec4 = self._add_decoding_layer(filter_count, False, dec3)
        dec4 = concatenate([dec4, enc4], axis=self.CONCATENATE_AXIS)

        # (32 x 32 x 4N)
        filter_count = first_layer_filter_count*4
        dec5 = self._add_decoding_layer(filter_count, False, dec4)
        dec5 = concatenate([dec5, enc3], axis=self.CONCATENATE_AXIS)

        # (64 x 64 x 2N)
        filter_count = first_layer_filter_count*2
        dec6 = self._add_decoding_layer(filter_count, False, dec5)
        dec6 = concatenate([dec6, enc2], axis=self.CONCATENATE_AXIS)

        # (128 x 128 x N)
        filter_count = first_layer_filter_count
        dec7 = self._add_decoding_layer(filter_count, False, dec6)
        dec7 = concatenate([dec7, enc1], axis=self.CONCATENATE_AXIS)

        # (256 x 256 x output_channel_count)
        dec8 = Activation(activation='relu')(dec7)
        dec8 = Conv2DTranspose(output_channel_count, self.DECONV_FILTER_SIZE, strides=self.DECONV_STRIDE)(dec8)
        dec8 = Activation(activation='sigmoid')(dec8)

        self.UNET = Model(input=inputs, output=dec8)

    def _add_encoding_layer(self, filter_count, sequence):
        new_sequence = LeakyReLU(0.2)(sequence)
        new_sequence = ZeroPadding2D(self.CONV_PADDING)(new_sequence)
        new_sequence = Conv2D(filter_count, self.CONV_FILTER_SIZE, strides=self.CONV_STRIDE)(new_sequence)
        new_sequence = BatchNormalization()(new_sequence)
        return new_sequence

    def _add_decoding_layer(self, filter_count, add_drop_layer, sequence):
        new_sequence = Activation(activation='relu')(sequence)
        new_sequence = Conv2DTranspose(filter_count, self.DECONV_FILTER_SIZE, strides=self.DECONV_STRIDE,
                                       kernel_initializer='he_uniform')(new_sequence)
        new_sequence = BatchNormalization()(new_sequence)
        if add_drop_layer:
            new_sequence = Dropout(0.5)(new_sequence)
        return new_sequence

    def get_model(self):
        return self.UNET
次に前処理関連の関数です(main.py)。
IMAGE_SIZE = 256

# 値を-1から1に正規化する関数
def normalize_x(image):
    image = image/127.5 - 1
    return image


# 値を0から1に正規化する関数
def normalize_y(image):
    image = image/255
    return image


# 値を0から255に戻す関数
def denormalize_y(image):
    image = image*255
    return image


# インプット画像を読み込む関数
def load_X(folder_path):
    import os, cv2

    image_files = os.listdir(folder_path)
    image_files.sort()
    images = np.zeros((len(image_files), IMAGE_SIZE, IMAGE_SIZE, 3), np.float32)
    for i, image_file in enumerate(image_files):
        image = cv2.imread(folder_path + os.sep + image_file)
        image = cv2.resize(image, (IMAGE_SIZE, IMAGE_SIZE))
        images[i] = normalize_x(image)
    return images, image_files


# ラベル画像を読み込む関数
def load_Y(folder_path):
    import os, cv2

    image_files = os.listdir(folder_path)
    image_files.sort()
    images = np.zeros((len(image_files), IMAGE_SIZE, IMAGE_SIZE, 1), np.float32)
    for i, image_file in enumerate(image_files):
        image = cv2.imread(folder_path + os.sep + image_file, cv2.IMREAD_GRAYSCALE)
        image = cv2.resize(image, (IMAGE_SIZE, IMAGE_SIZE))
        image = image[:, :, np.newaxis]
        images[i] = normalize_y(image)
    return images
最後にこれらを利用するメイン関数です(main.py)。これを動作させるためには以下のファイル/フォルダ構造を想定しています。 - main.py - unet.py - trainingData(トレーニング用データを格納するフォルダ) - testData(テスト用データを格納するフォルダ) 更にtrainingDataフォルダ、testDataフォルダには最初に紹介したデータセットにあるleft_imagesフォルダとleft_groundTruthフォルダがそれぞれ置かれているものとします。
- 2017/08/10 関数predictのモデル生成部の不具合を修正
- 2017/11/08 import osを書き忘れている不具合を修正
import os
import numpy as np
from keras.optimizers import Adam
import keras.backend as K
from keras.callbacks import ModelCheckpoint, EarlyStopping
from unet import UNet

# ダイス係数を計算する関数
def dice_coef(y_true, y_pred):
    y_true = K.flatten(y_true)
    y_pred = K.flatten(y_pred)
    intersection = K.sum(y_true * y_pred)
    return 2.0 * intersection / (K.sum(y_true) + K.sum(y_pred) + 1)


# ロス関数
def dice_coef_loss(y_true, y_pred):
    return 1.0 - dice_coef(y_true, y_pred)


# U-Netのトレーニングを実行する関数
def train_unet():
    # trainingDataフォルダ配下にleft_imagesフォルダを置いている
    X_train, file_names = load_X('trainingData' + os.sep + 'left_images')
    # trainingDataフォルダ配下にleft_groundTruthフォルダを置いている
    Y_train = load_Y('trainingData' + os.sep + 'left_groundTruth')

    # 入力はBGR3チャンネル
    input_channel_count = 3
    # 出力はグレースケール1チャンネル
    output_channel_count = 1
    # 一番初めのConvolutionフィルタ枚数は64
    first_layer_filter_count = 64
    # U-Netの生成
    network = UNet(input_channel_count, output_channel_count, first_layer_filter_count)
    model = network.get_model()
    model.compile(loss=dice_coef_loss, optimizer=Adam(), metrics=[dice_coef])

    BATCH_SIZE = 12
    # 20エポック回せば十分
    NUM_EPOCH = 20
    history = model.fit(X_train, Y_train, batch_size=BATCH_SIZE, epochs=NUM_EPOCH, verbose=1)
    model.save_weights('unet_weights.hdf5')


# 学習後のU-Netによる予測を行う関数
def predict():
    import cv2

    # testDataフォルダ配下にleft_imagesフォルダを置いている
    X_test, file_names = load_X('testData' + os.sep + 'left_images')

    input_channel_count = 3
    output_channel_count = 1
    first_layer_filter_count = 64
    network = UNet(input_channel_count, output_channel_count, first_layer_filter_count)
    model = network.get_model()
    model.load_weights('unet_weights.hdf5')
    BATCH_SIZE = 12
    Y_pred = model.predict(X_test, BATCH_SIZE)

    for i, y in enumerate(Y_pred):
        # testDataフォルダ配下にleft_imagesフォルダを置いている
        img = cv2.imread('testData' + os.sep + 'left_images' + os.sep + file_names[i])
        y = cv2.resize(y, (img.shape[1], img.shape[0]))
        cv2.imwrite('prediction' + str(i) + '.png', denormalize_y(y))


if __name__ == '__main__':
    train_unet()
    predict()
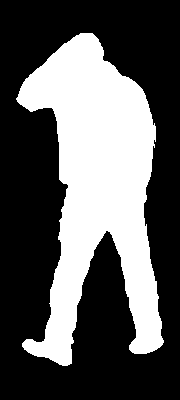
上手く抽出出来ている例(元画像/正解画像/予測画像)


上手くいかなかった例(元画像/正解画像/予測画像)


上手くいっていない例を見ると、学習データに類似パターンが無さそうなケースでした。学習していないことを予測できないのは仕方無いので、学習用データに十分なバリエーションを持たせて学習させることが重要と思いました。